GitHub pages 6 | Add navigation tags
Let’s add some navigation. I’ve found two ways to add navigation to your side.
One way to do this is to simply add additional pages, then add a navigation menu and hardcode everything. While this probably works I just hate hard-coded stuff and don’t think anyone should waste time and effort with keeping code alive if there is not a really good reason to do so.
Lucky for us Jekyll offers another way to do navigation with its “built-in plugin” called jekyll-archives. Unlucky for us GitHub pages does not support jekyll-archives..
But this guy here (Big time Kudos!) found a pretty cool solution which I used as a base and customized a little bit..(due to my complete lack of html skills it took me a couple of days but if I can do it, you can too!)
Actually, I had to invest quite some work because I didn’t just want a list with all posts, but I wanted my list to actually filter when I click a tag!
Important note: Jekyll is static and gets executed when the page is loaded. To get the interaction we need to add some Javascript and filter out the posts we don’t want to see upon a click.
Solution
Most of the changes will be in your home.html
Go to your folder _layouts and open your home.html. This is what we will change first - if you want you can copy it for your references so you can always go back (without going through your version control).

Step 1: create a list of tags
First you add the following code at the top of the home.html to extract all the tags, sort them and remove duplicated ones.
{% assign rawtags = "" %}
{% for post in site.posts %}
	{% assign ttags = post.tags | join:'|' | append:'|' %}
	{% assign rawtags = rawtags | append:ttags %}
{% endfor %}
{% assign rawtags = rawtags | split:'|' | sort %}

{% assign tags = "" %}
{% for tag in rawtags %}
	{% if tag != "" %}
		{% if tags == "" %}
			{% assign tags = tag | split:'|' %}
		{% endif %}
		{% unless tags contains tag %}
			{% assign tags = tags | join:'|' | append:'|' | append:tag | split:'|' %}
		{% endunless %}
	{% endif %}
{% endfor %}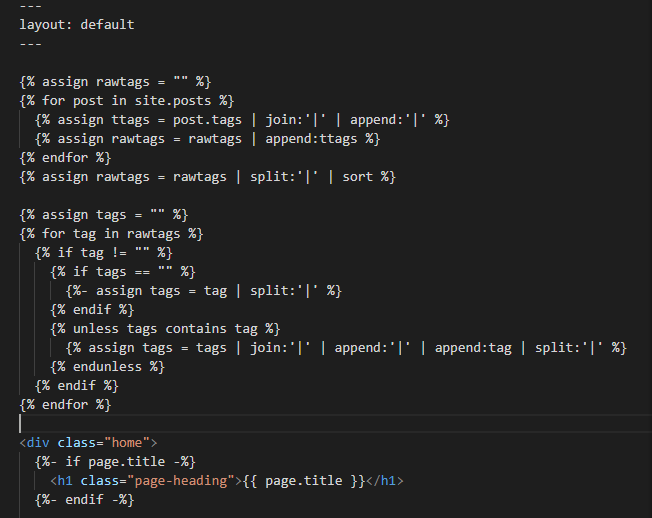
Step 2: add the tags to the site
Then add the list of tags as an element above the post-list header element in line 32. This code adds each tag as a hyperlink and executes the function click_the_tag with the id of the tag that we clicked.
{% for tag in tags %}
<a id={{tag}} class="post-tag" href="#{{ tag | slugify }}" onclick="click_the_tag(this.id)"> #{{ tag }} </a>
{% endfor %}
I also added a tag #all at the beginning of the tag list to show all posts again. To do this we can simply add the following code above
<a class="post-tag" href="">#all</a>
Step 3: create the base function
Now we are ready to add the frame of our javascript function. The frame will just select the clicked tag and change the element named tagID to this tag.
<script>

  function click_the_tag(clicked_id) {
    document.getElementById("tagID").innerHTML = "#" + clicked_id;
  }

</script>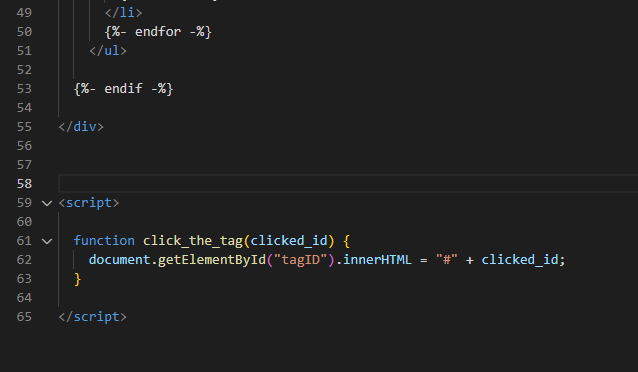
To immediately test the function we also adjust the html a little.
<h2 class="post-list-heading">{{ page.list_title | default: "Posts" }}</h2>Replace the code above with the code below.
<h2 class="post-list-heading"><span id="tagID">#all</span> posts</h2>It should look like this now:

Test it and see how it changes based on what you click. Your url changes too, so you can easily see what was clicked.
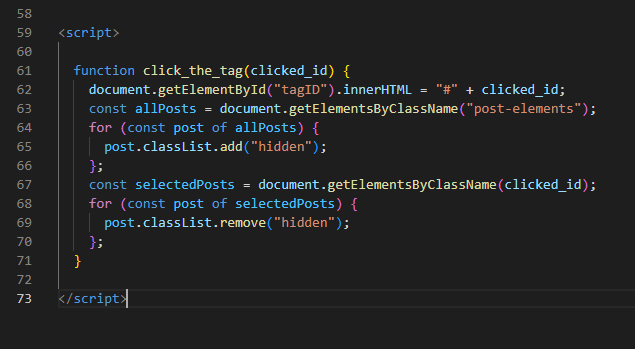
Step 4: add the logic to the function
Now you can add the rest of the function. First we create an object that stores all posts with the class “post-elements”, then it iterates through them and adds a class “hidden”. Then we do the same for the posts with the class that we selected, iterate through them and remove the class “hidden” again.
const allPosts = document.getElementsByClassName("post-elements");
for (const post of allPosts) {
	post.classList.add("hidden");
};
const selectedPosts = document.getElementsByClassName(clicked_id);
for (const post of selectedPosts) {
	post.classList.remove("hidden");
};
remember: the whole page is rendered already so we actually just need to hide some unwanted elements
Step 5: add a class to your CSS
Now we go to your folder _sass/minima and add a class named hidden to the file _layout.html.
Add a new segment at the top for Custom.
/**
 * Custom
 */

.hidden { display: none; }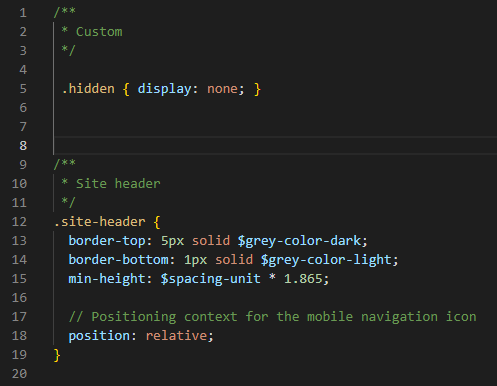
Step 6: add the new class to your elements
Now we add the class post-elements to each element that links to a post in home.html. We also add a class for each tag a post has with the same name. This will then be used by the function to identify where to remove the class “hidden”.
      {% assign joinedtags = post.tags | join:" " %}
      <li class="post-elements {{ joinedtags }}">
Test it and see how the list changes..
Step 7: add the tags to each post in the list
Last thing is to add the tags meta information to each post link in the list. Just add the following span element which sorts, joins and adds each tag for the respective post.
<span class="post-meta"> {{post.tags | sort | join:" #" | prepend: "| #"}}</span>
Step 8: add the tags to each post site
Last step is to also add the information above in every post. Go to _layouts/post.html and insert the following code at the end of the p-element with the class post-meta.
Note how we use page.tags now instead of post.tags
<span>{{page.tags | sort | join:" #" | prepend: "| #"}}</span>Also, I changed the first part of th author-element to get rid of the bullet point.
| <span itemprop="author" itemscope itemtype="http://schema.org/Person"><span class="p-author h-card" itemprop="name">{{ page.author }}</span></span>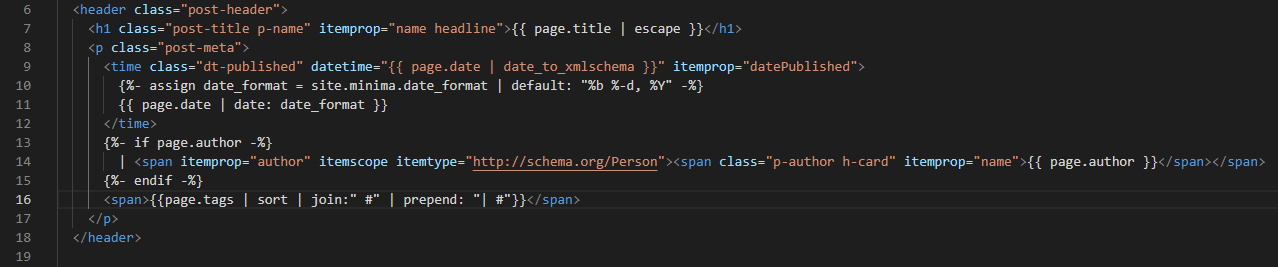
References
Here I learned how to get the ID from a clicked tag so you can filter down the posts.
The display property stuff comes form here
More References for Jekyll archives
This guy shows a way to deploy the archives plugin on GitHub pages. This could actually work but I think it is way to much effort and a lot harder to implement than my solution.
You can check out how to work with Jekyll archives in general here and here if you want to deploy it to your own webserver.