GitHub pages 1 | Build a jekyll website
This post explains how to build a simple website and host it for free. We will use GitHub pages and Jekyll and follow the instructions of jekyllrb with a focus on getting you up and running as fast as possible. I use their vanilla template minima for these reasons:
- zero trust (I don’t know what others put into it) - but if you follow these steps you can build your own, perfect template
- version updates
- readability - a vanilla template is easy to scan
- customizing - if I customize a vanilla template everyone can participate easily
Steps:
- Create new repository
- Install Jekyll
- Run Jekyll locally with Vanilla template
- Publish to GitHub
Step 1: GitHub Repository
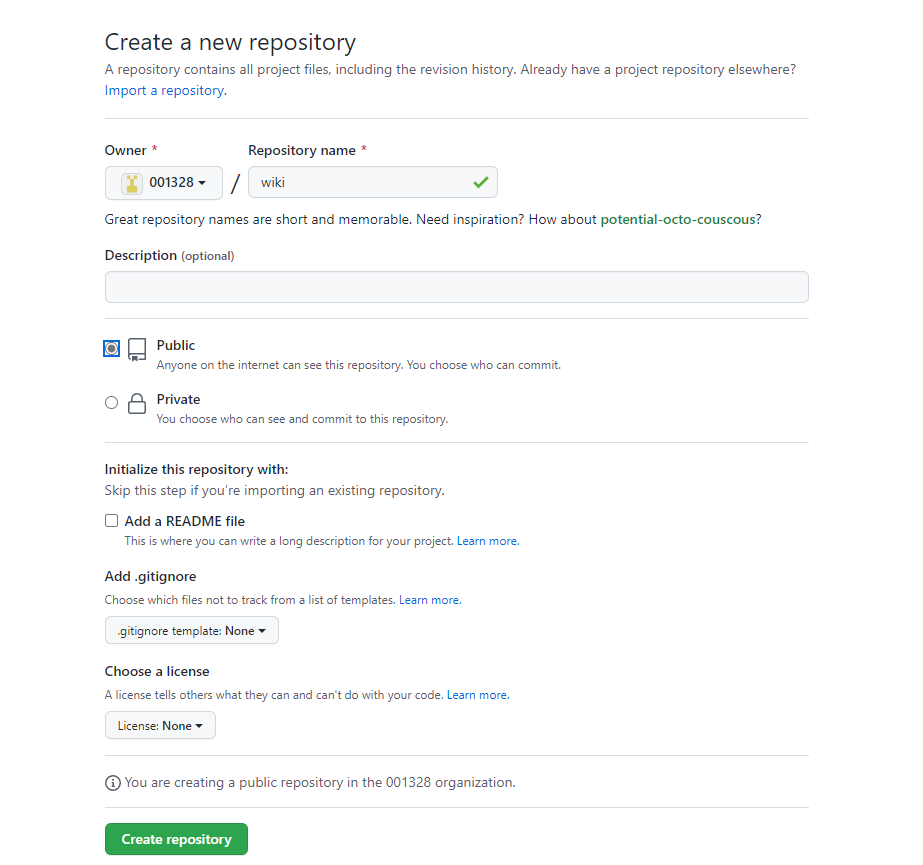
- Go to github and create a new Repository
I created a dedicated organization (001328) for it as I want all repositories of my azure data platform grouped together and I have it public so it’s free. If you do this for a company either make it private or use github enterprise
- clone the new repository (wiki) to your local computer, use any local path you like
- (link - top set up a github account / organisation)
- (link - how to set up github on your local computer)
-
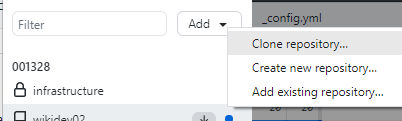
you will find the url in your github repo

-
open github desktop and clone your new repository to your computer via the Add Button
-
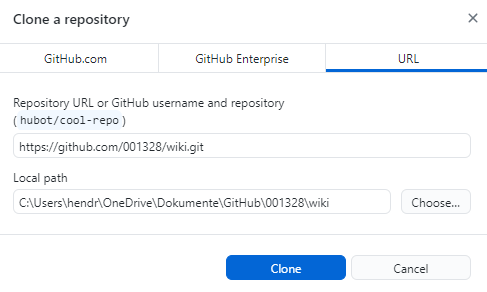
enter the URL you copied from github.com
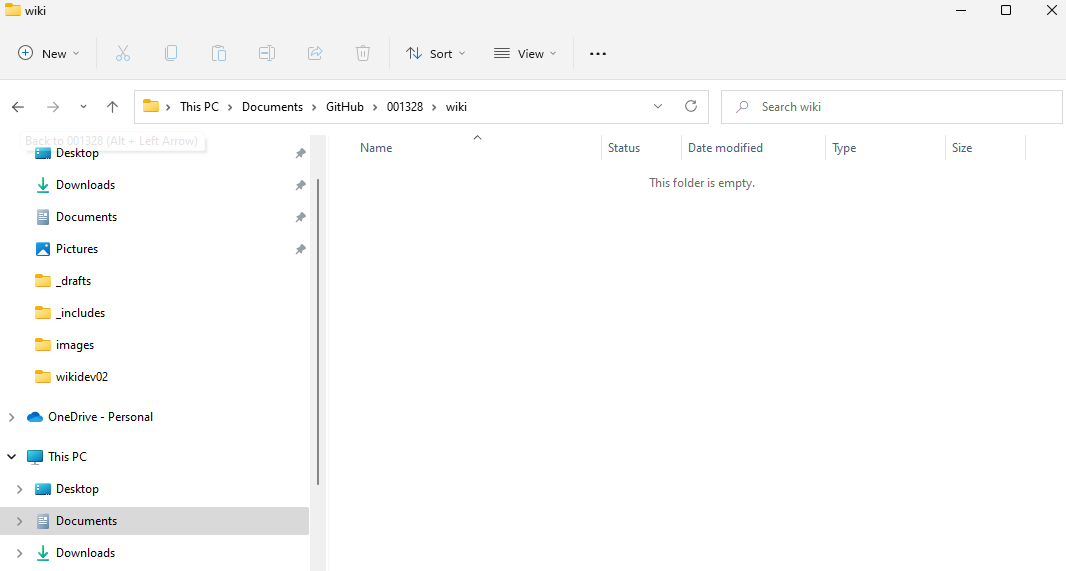
- once cloned you have an empty folder on your local machine
Step 2: Install Jekyll
Following the quickstart instructions on jekyllrb provides you a great starting website with the very simpel minima template. To host it for free we will change only one step.
- installation for windows (you can find other guides here)
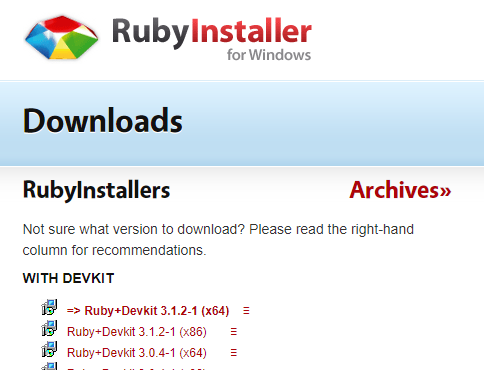
- Download and install Ruby+Devkit with default options.
- Run the ridk install step and choose the options MSYS2 and MINGW development tool chain
open command prompt and check for proper installation with
ruby -v
- Download and install Ruby+Devkit with default options.
Step 3: run your website locally
-
open command prompt and go to the cloned directory
cd xxx/GitHub/001328do not cd into the folder yet - Open command prompt window (start+cmd), install via
gem install jekyll bundleropen command prompt and check for proper installation with
jekyll -v - create a new jekyll site into the newly created repository folder
jekyll new wiki - change into your new directory
cd wiki - Build the site and make it available on a local server
bundle exec jekyll serveuse
bundle exec jekyll serve --livereload so it reflects changes - Browse to http://localhost:4000
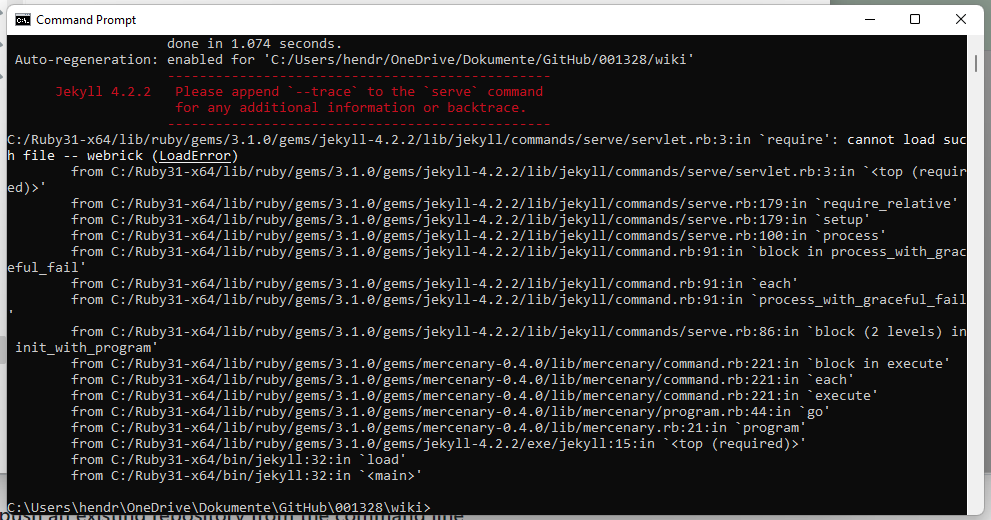
in July 2023 there was the webrick gem missing - add it via
bundle add gem webrick
Step 4: publish to github-pages
- open the gemfile in the new directory (right click and open with visual studio code or notepad++)
- comment line 10 (put a # in front), uncomment line 15 (gem “github-pages”)
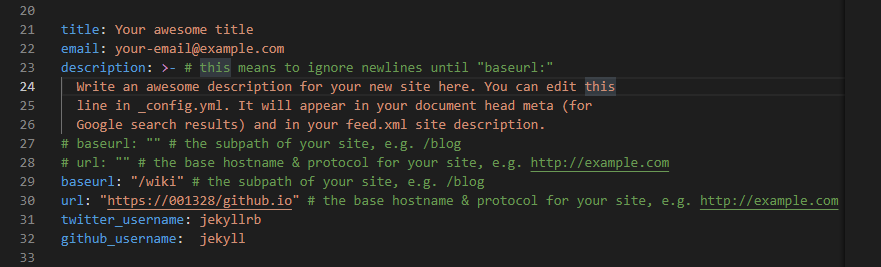
- open the config file in the new directory (add new lines and comment out the other ones)
- baseurl: “/wiki”
- url: “https://001328/github.io”
Note: If you want to publish your website to enterprise github you need to put the enterprise github address into url and your organization/repo in baseurl
baseurl: "/organization/repository/"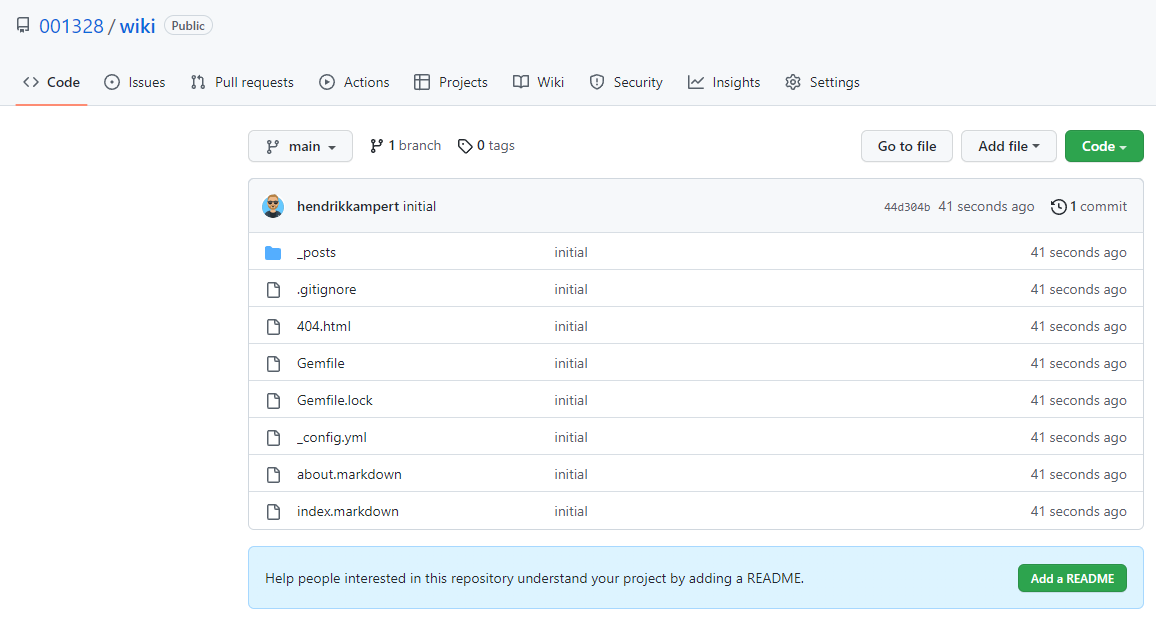
url: "https://pages.git.xxx.com"- publish to github in repo (commit and push to main branch)

you will now see a folder _posts and some files
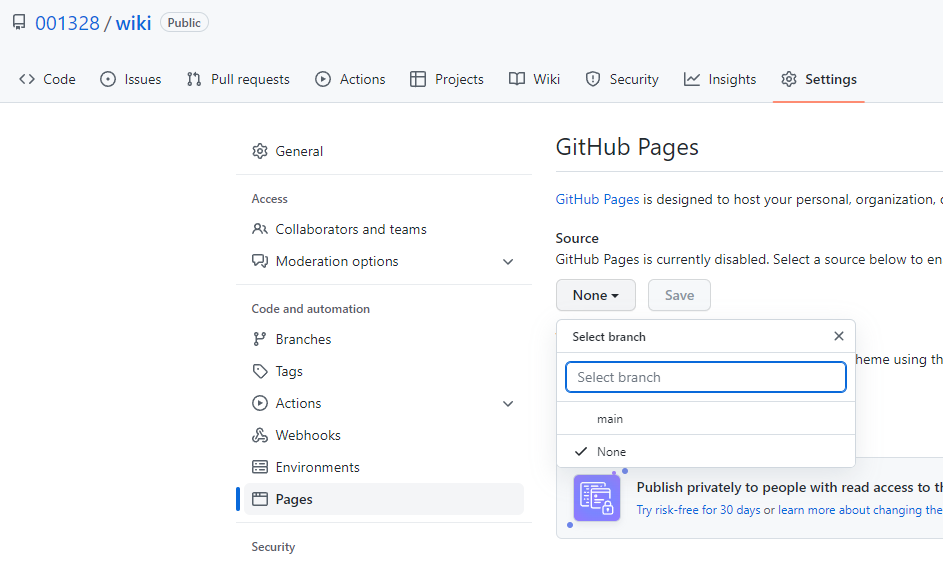
- make a github page out of it
- go to the settings within your repository
- open the menu “Pages”
- enable GitHub pages with the main branch
- check it out here: https://001328.github.io/wiki/ n(make this your address)
- wait 1 minute so the css can load within github pages

Attention: if you want to run it local, you need to adjust the config file again so baseurl and url are empty (Step 2)
Next Steps
Now we can create our own domain and give it a custom name!
Other
minima
Minima is a one-size-fits-all Jekyll theme for writers. It’s Jekyll’s default (and first) theme. It’s what you get when you run jekyll new.
We will take this as the base for the section of creating-content